Sunday 6 July 2014

How to deal with broken comb

If you look back at the post I made on the 15th of June, the bees had built their own wall of comb in a gap in Jenny's hive. It stretched vertically all the way up, so when we lifted the super off it broke horizontally across the middle. It's structurally fragile, and breaks very easily - you can't handle it or move it around. Normally, the bees would be building on the base the beekeeper has prepared: a sheet of wax set in a frame, with wire threaded through it in a zig-zag pattern to give it some underwiring support. Jenny tells me you can also improvise a similar strengthening support for top-bar beekeeping (where you only have the top bar, but not the other three sides that would make up a frame): you take an old coathanger and affix it to the top bar so that it hangs in a loop, and servers the same purpose as the wire.

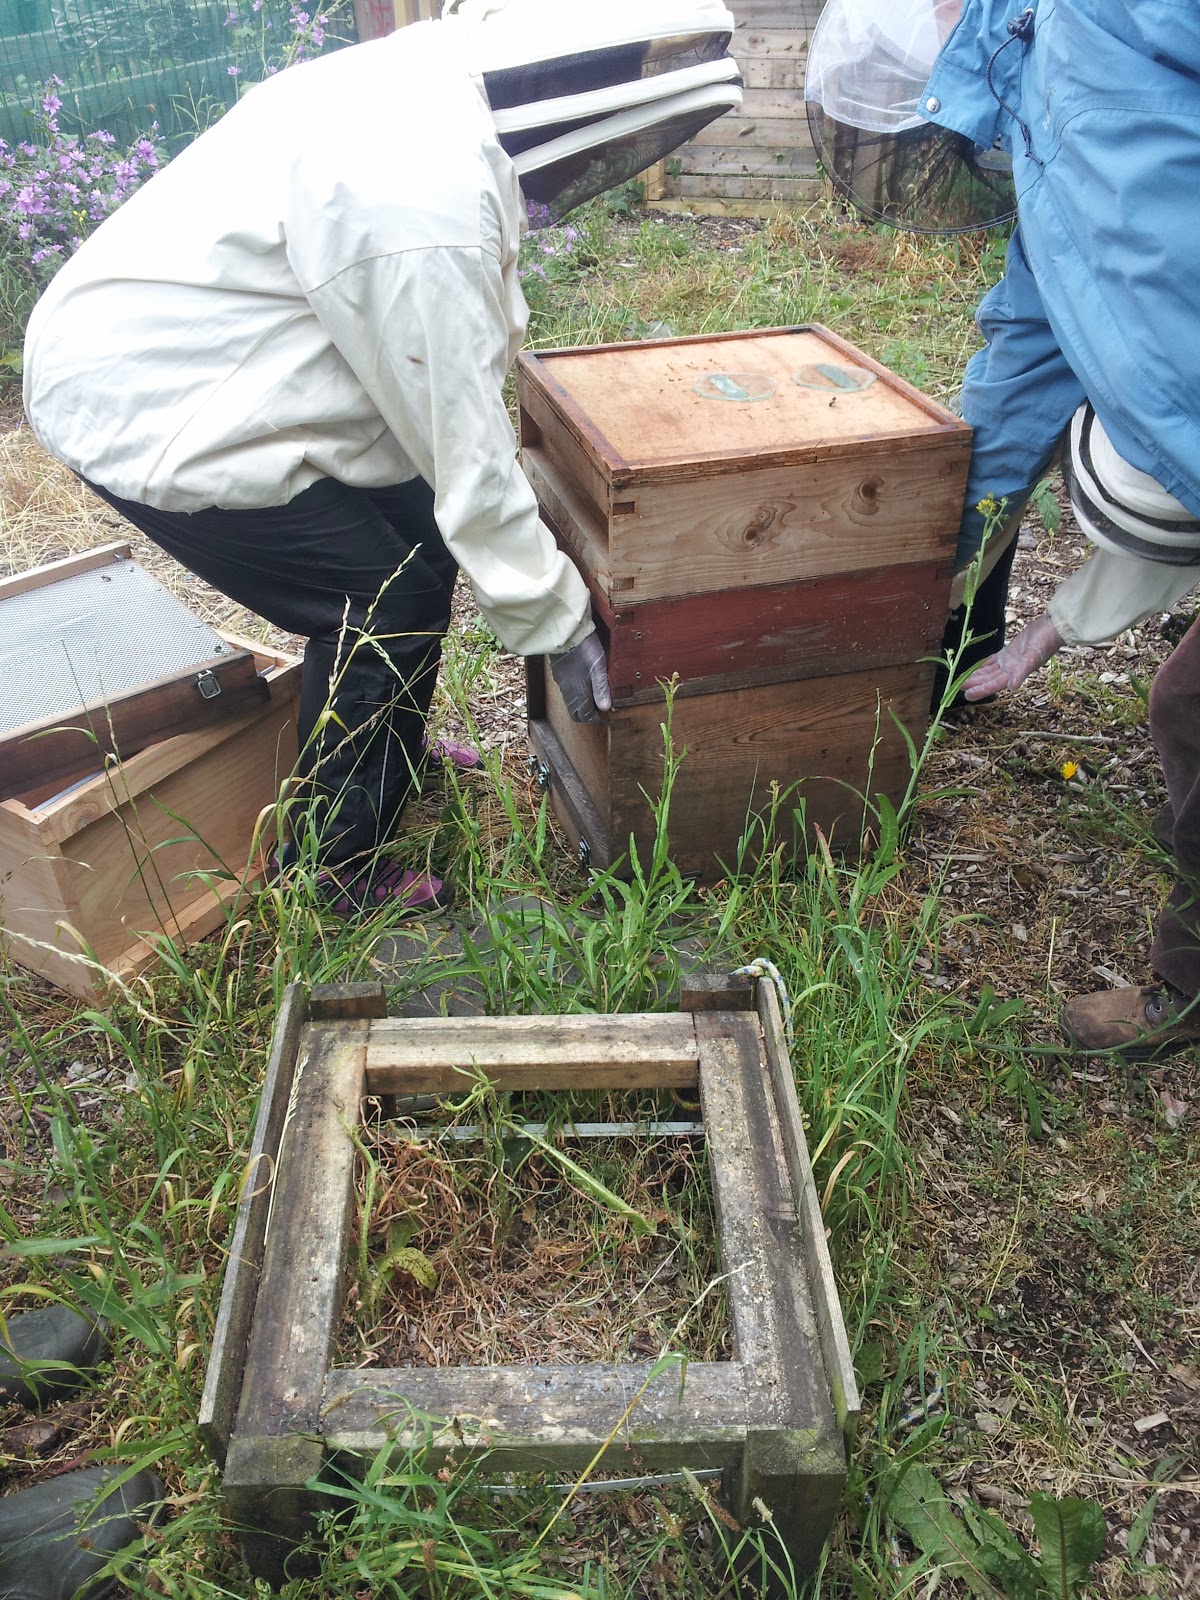
Jenny would like to encourage the bees out of the broken wall of comb, so we will move the frames that surround it into a new box. We are all wearing the protective gear today as it could make the bees cross. First of all we lift the whole hive off its base:

Then we place the new floor on the base:

...and the new box on top:

Next, we carefully wiggle the top off the hive, smoking the bees through the gap:


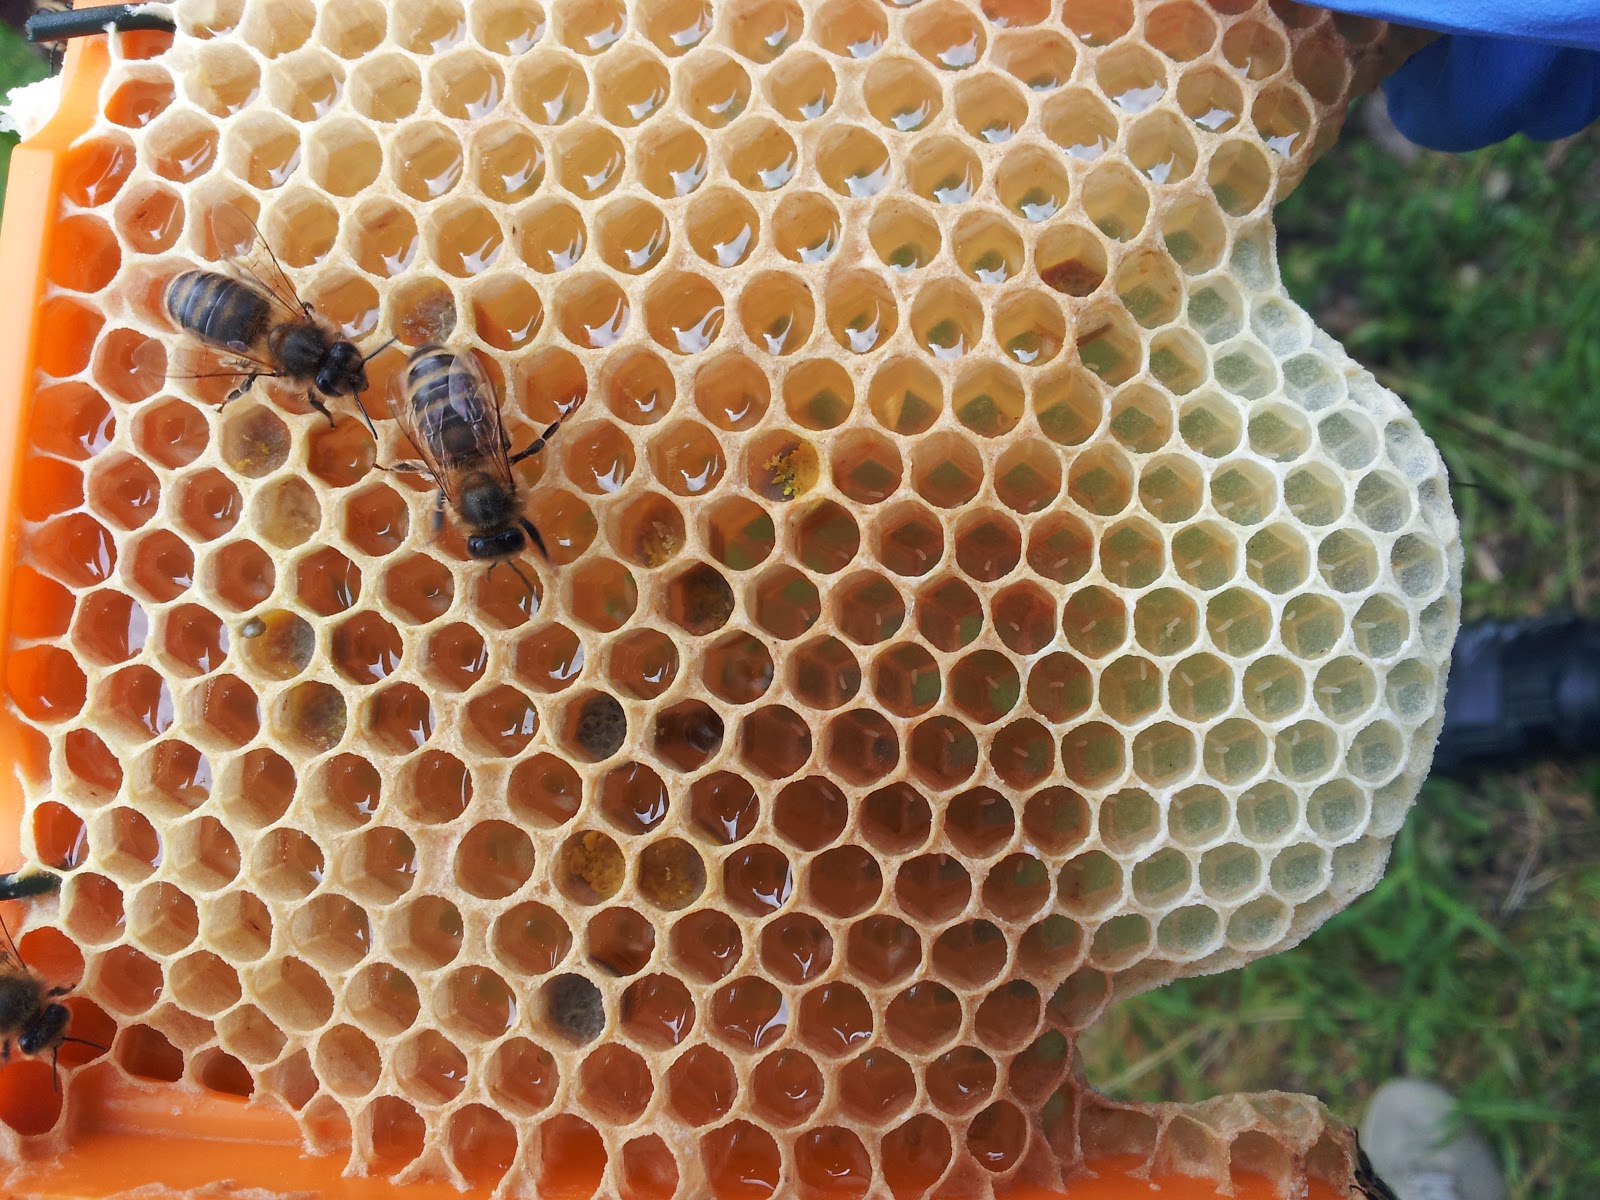
we take the super off and you can see the broken wall of comb:

We transfer the frames one by one to the new box:


Till only the collapsed wall of comb is left in the old box. What a mess:

When we've filled the new box with the frames, we put the super on top. Lastly we put the box with the broken comb right at the top. The hive is looking very tall now!

The last, messiest bit was taking the old floor out sideways (the bit in the photo halfway up the hive with the metal clips and gap on the side), as bits of broken comb were falling out. No photo as we were all busy pushing the comb back in! We hope the bees will abandon the broken wall and move down to the new box. Wait and see.

Job done - that's Jenny's hive sorted. Here is the crack team changing gloves now to have a look at the Glengall colony (the new one we are trying to establish). We have to change gloves between handling hives to prevent the spread of any diseases (hopefully there aren't any - it's just a precaution).

With the Glengall colony, we did the same as last time: we moved a couple of frames upstairs, leaving them spaced far apart (which the bees don't like):

... and replaced them downstairs in the bottom box with a couple of top bars, to continue to encourage the bees to move off the frames and onto the top bars:

In time we should end up with only top bars left in the hive and be able to move the bees to the new hive you see in the picture you saw behind the team, which is designed for 'top bar beekeeping' (no frames).

We got to have a close look at some bees that were hanging around, probably disoriented for a bit by the move. The more squat ones with dark brown bottoms are drones and the stripy ones worker bees:

Jenny showed us this little device (which we didn't actually use): you put it on the floor of an upper box when you are ready to take the honey from it; the bees go down the round hole and push through the thin flexible strips of metal to get through to the lower box but can't get back up (except the very small or clever ones).


That's it. A busy day!


Sunday 22 June 2014

More room for the growing hives

First of all today, we inspected the varroa board Jenny had placed on the floor of her hive last week (she brought her hive in to support the new colony at Gengall). It's bright yellow so you can easily see anything that has dropped onto it. The idea is to check the board for varroa mites and see how many there are. If there are more than 15 you need to take action. We took it in turns to have a close look with a magnifying glasss. Fortunately no-one could spot anything suspicious, except for one oval brown shape I spotted, which Jenny thought could be a varroa, although it was hard to see whether it had legs. She said she'd take the droppings home to have a closer look, sat at a chair, which would be easier. This is the varroa board:


 And a close-up (not sure where the varroa is that I spotted with the magnifying glass!). Apparently the orange and yellow bits are bits of pollen and the lighter coloured ones bits of wax.


Jenny explained that if action had to be taken, we would be putting a half frame in the middle of the hive, waiting for it to be filled with drone brood, then discard the brood. I'm unsure of the exact logic (why the drone brood? Is the mite more likely to lay eggs in drone brood cells? How do we know it will be drone brood in the half-frame?), but the idea is to make a cull of the brood to reduce infestation without having to sacrifice the whole colony.

There is also a thing called a bee louse which apparently is harmless so you have to be able to spot the difference between it and a varroa mite. I've found this picture online; the one at the top is a bee louse and the other three are all varroa mites.


The bees in Jenny's hive had been very busy building last week - making that whole wall of comb without a frame - so this week Jenny had been herself busily making new frames for a 'super' to add on top and give the bees room to grow, hoping she would not bee too late (was she worried they might swarm if they ran out of space?). Here is the very full hive, with lots of new pale white comb full of luscious honey:


And the new super placed on top:


Once that was done we opened the second hive, and looked at this frame - apparently bees will be hatching from it soon - the dark colour is an indication that it's used for broods as opposed to honey. There is pollen on there too. 


We moved this frame out and up to the top level of the hive, replacing it with a 'top bar'. The top bar is the top horizontal piece of the frame that rests on the sides of the hive at either end, carrying the weight of the frame, comb, honey and bees. But this top bar we replaced the frame with doesn't have the other three sides which would have made it into a frame. Without the sides, the bees will attach their own oval shaped comb structure to it. We saw they had made a lot of those last week already (look at the pictures in last week's blog). 

I had wondered last week why we were letting the bees make their own comb shapes and learnt today that the intention is to transfer them to a third hive which the group built earlier, and is currently sitting empty. It's a different hive design so would not take the traditional rectangular frame shape. Here it is. The sides taper downwards:


The idea here is that by moving the one frame up to the top at a time, the bees will hatch from the frame and move down to the lower half of the hive where all the other bees are (the queen in particular doesn't like crawling around a single frame with no adjacent frame on the other side to keep warm and cosy, so she won't come up there to lay more eggs), leaving that frame at the top empty (so we can take it out) and building some more leaf-shaped comb in the bottom of the hive, to be moved to the newly built hive later.

Sunday 15 June 2014

The bees are not doing so bad after all

Second bee group meeting today at Glengall Wharf Gardens. First of all we checked the old queen's 'retirement home'. It looks like a small brown polystyrene cool box, and contains small orange plastic frames. Jenny put some thick sugar syrup in it, at the back (almost the texture of cake icing). Perhaps it's just to be really sure to make sure the old queen and her retinue don't go hungry.


We had a closer look at one of the frames and could see the larva, each in their own alveola, which looked like tiny grains of rice. She's still laying.


Next, we check the 'new' hive. It's the one the old queen came from. Jenny moved the old queen away to prevent the bees from swarming. We don't know whether the new queen has hatched yet. She should take about three weeks. Then it will be another month before she starts laying eggs, which means there will be a gap where no new bees are being raised. Nobody will replace the ones that die, but there will also be fewer mouths to feed.

This was the hive to which Jonathan and I added sugar syrup on Monday. We were worried as the bees didn't seem to be very interested in the sugar - there was as much left now as we had left. On opening the hive there's a surprise, but a good one: the bees have been very active and built lots of new comb since we last opened up the hive two weeks ago. They have clearly been out foraging, which explains why they weren't interested in the sugar syrup. The new comb is very pale and hangs from the frame-less top bars; in the absence of a frame, the bees have built it in organic leaf-shaped clusters suspended from the top bars:


This is just to show how the sugar syrup feeder works: there is a top board with a hole in it:


Then the feeder is placed directly on top of the hole, so the bees can come straight up from the hive through the hole, under the inverted clear plastic cup, then down the sides of the cup to feed on the syrup without drowning in it:


Last, we checked Jenny's own bees in the hive she brought in as 'support' for the new one. There had been lots of growth in that one too: the bees had built a few bridges between the frames:


They had also built a whole new 'wall' of comb in a gap at the back of the hive:


This was the 'super' (the top layer or 'floor' of the hive/building if you like) of the hive; we lifted it up to see how they were doing on the bottom level. As we did so, we ripped through the wall of comb, exposing some larva. Jenny told us that these would not survive so the bees would eat them! No wastage then ( a bit off-putting though)!